Creating containers in the cloud
Overview
Teaching: 20 min
Exercises: 0 minQuestions
How can I create Docker containers in the cloud?
Objectives
Demonstrate how to effect creation of a container from the Docker image in the cloud.
Gain an initial experience of the container functionality provided by Google Cloud’s Compute Engine.
Creating Containers on Cloud Platforms
There are lots of ways containers can be run on cloud computing platforms (a.k.a., “in the cloud”). Most commercial cloud providers now offer a container hosting service that will connect to the Docker Hub (and their own container registries) in order to fetch the container images that you specify, and charge for the time and resources that the containers use.
Free and Introductory Offer Container Hosting Options
Please note these options can be constantly changing, check with the Cloud providers webpage for the latest details. Beware that many of the free trials require you to give payment information and you will be billed at the end of the trial or if you exceed the free trial limits. Many of the cloud providers offer charge limit options, set these to ensure you don’t get an sudden large bill.
Educational Credits
For this lesson (run by AIMLAC CDT, January 2021) we have received free credit from Google for $50 per student, you will not need to register a credit card to use this. You will have each been emailed a link to activate this.
Running a container in the cloud, using your Google account
Setting up your account
- Click the link you’ve been sent to activate your Google Cloud credit. This should create a billing account using the credit you’ve been given.
- Open a web browser window and visit https://console.cloud.google.com/.
- Log into your Google account if required.
- Create a new project called AIMLAC and link it to the billing account you just created. Be especially careful if you already use Google Cloud personally that you are billing the right account.
Creating a virtual machine
- Click on the grill menu, Compute Engine, VM Instances
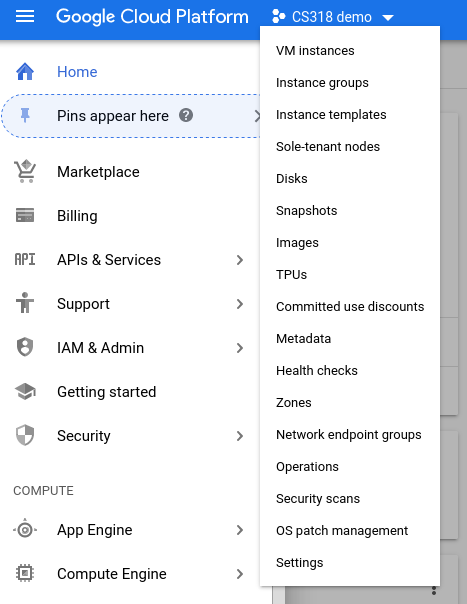
- Click on “Create Instance” on the page showing the list of current instances.
- Give your VM a name, as we won’t need much processing power choose f1-micro as the Machine type by selecting the N1 Series.
- Change the operating system to the Container Optimised OS
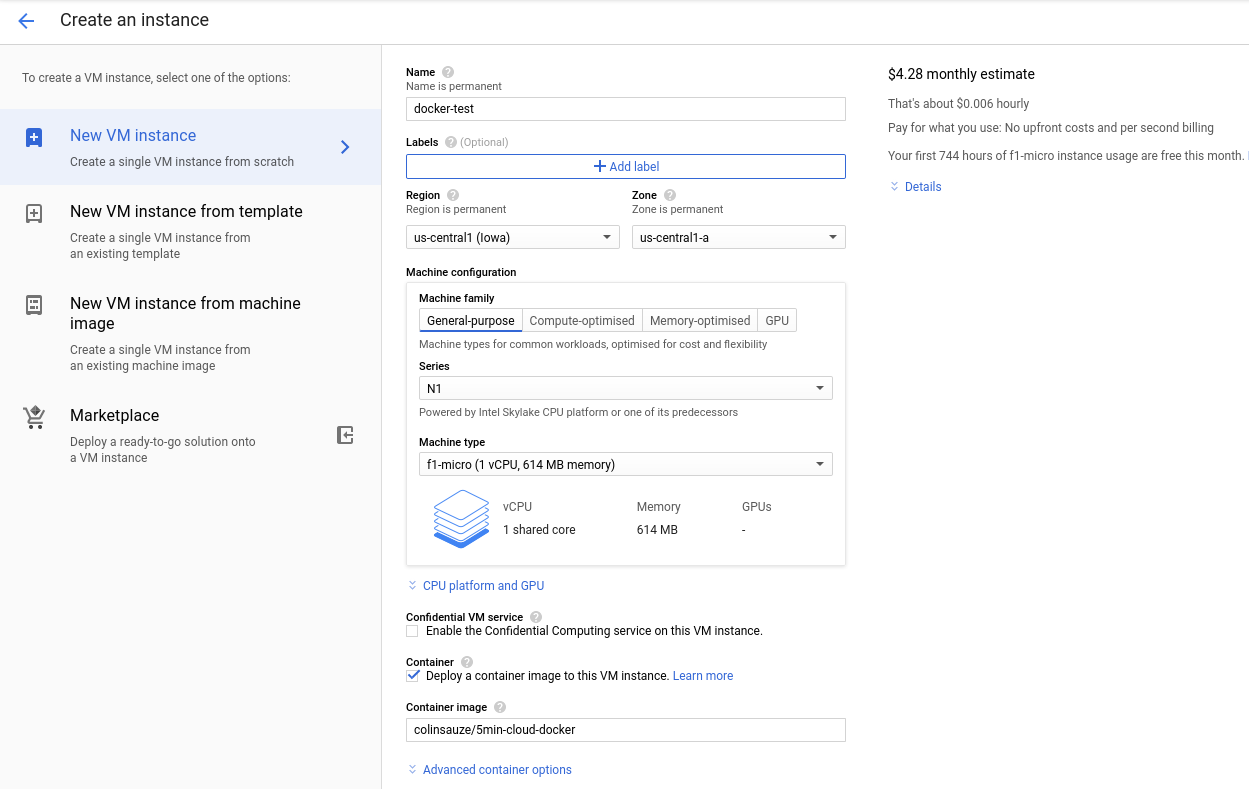
SSH into your container from the Google Cloud Console
- Click on the SSH option under the connect column in the VM Instances page and choose “Open in browser Window.”

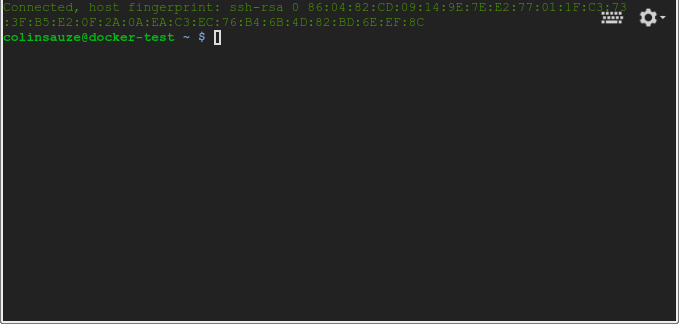
- From here you can run docker commands and launch the container as you’ve previously done by typing:
$ docker run -it alice/alpine-python
When using the docker run command (as you have done previously), the container takes some default actions after being created, which are specified in your Dockerfile (e.g., the CMD line).
SSH into your container from your computer’s SSH client
If you want to SSH into your Google Cloud virtual machine from your computer’s SSH client instead of the web interface you’ll need to generate an SSH key and add it to the virtual machine.
If you’ve never done this before generate an SSH key with the ssh-keygen command in your terminal.
$ ssh-keygen
This will create two files in the .ssh directory inside your home directory. One called id_rsa and the other id_rsa.pub. These form the public and private halves of an encryption key, you need to place the public half on any systems you want to login to. Display the contents of the id_rsa.pub file and copy it to the clipboard. Then from the Compute Engine VM Instances page do the following:
- Click on the instance name
- Click edit on the top of the screen
- Scroll down to the bottom of the page and find the “SSH keys” section, it will say “You have 0 SSH keys”.
- Click on the “Show and edit” link.
- Paste in your public key into the box saying “Enter public SSH key”
- Scroll down and click Save
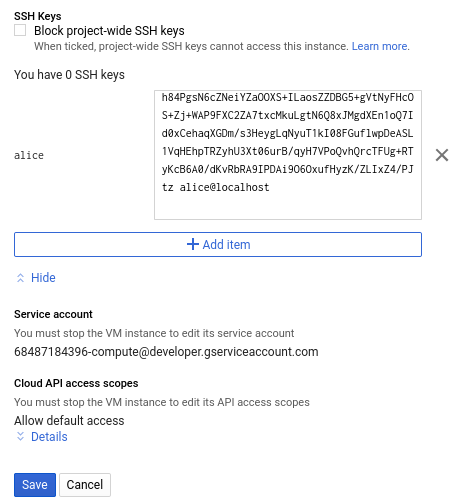
- Return to the VM Instances page
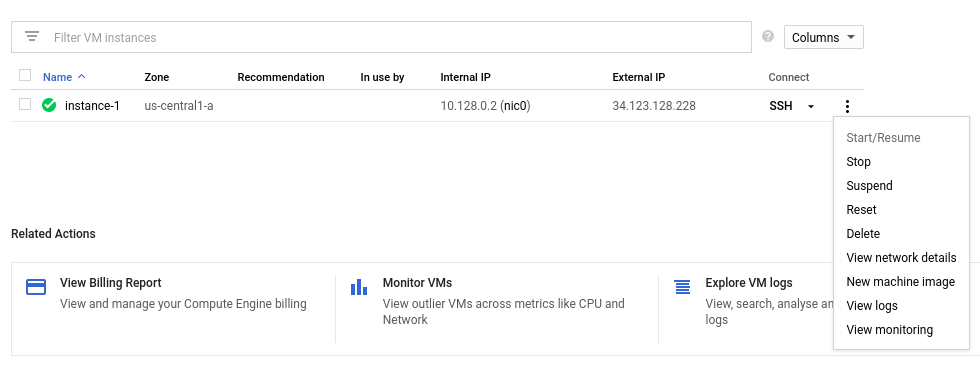
- Note the external IP address of your virtual machine (104.154.185.63 in the screenshot above, your’s will be something different)
- Open a terminal and type ssh followed by a space and the external IP address.
- You should be logged in automatically to your virtual machine without being asked for a password.
- Note that your username will be the same as the username which you use on your computer and which was specified in the key file.
Destroying your virtual machine
- From the VM Instances page click the 3 vertical dots at the end of line for your VM.
- Choose “Delete”
- Confirm the deletion
- Your VM and any associated disks will be deleted
Running a web server container from Google Cloud
Now lets create a new Dockerfile which defines a container based on the nginx webserver. Create a directory called docker-webserver-example and cd into it.
mkdir docker-webserver-example
cd docker-webserver-example
Open up a text editor for a new Dockerfile and type/paste in the following:
FROM nginx
MAINTAINER your@email.address

COPY startup.sh /

RUN apt update
RUN apt -y install procps
RUN chmod 777 /startup.sh

#expose the web server port to outside the container
EXPOSE 80/tcp

ENTRYPOINT ["bash","/startup.sh"]
In the same directory create another file and call it startup.sh and type/paste in the following code. This code will start the nginx web server and then every second it will update index.html (the default webpage) with the current time and a random number.
#!/bin/bash

nginx

#loop forever
while [ "0" = "0" ] ; do
    time=$(date +%H:%M:%S)

    echo "My latest random number is $RANDOM and the time is $time" > /usr/share/nginx/html/index.html
    sleep 1
done
Now build the container we’ve just specified
docker build -t alice/docker-webserver-example .
Now lets push it to Docker Hub:
docker push alice/docker-webserver-example
Go back to the Cloud console’s VM Instances page and do the following:
- Click on “Create Instance” on the page showing the list of current instances.
- Give your VM a name, as we won’t need much processing power choose f1-micro as the Machine type by selecting the N1 Series.
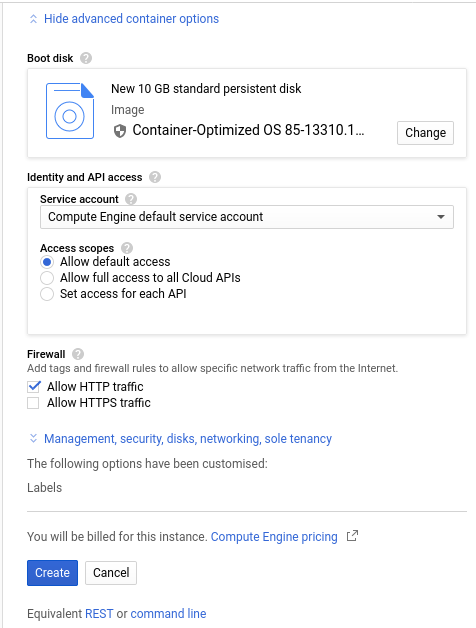
- Tick the option “Deploy a container image to this VM instance”.
- Enter the path to container on Docker Hub which runs a webserver (in this case alice/docker-webserver-example) in the “Container image” box.
- Scrolldown and tick “Allow HTTP traffic” at the bottom of the page under Firewall
-
Click create
-
Go back to the VM Instances page in the Google Cloud Console and click on the link to the external IP address (104.154.185.63 in this example) or type this address into a new tab/window of your web browser.

- You should see a webpage giving the time and a random number.

- Don’t forget to delete the instance when you are done with it.
Key Points
You can create Docker containers on cloud computing resources just using a web browser.
Google Cloud’s Compute Engine is an online repository storage service that can create Docker containers to perform computation on demand.